To maintain optimal UV protection and structural integrity, you should reapply deck stain every two to three years for transparent or semi-transparent finishes, and every four to five years for solid stains. This frequency ensures the wood fibers remain shielded from solar radiation and moisture penetration, preventing the wood from graying, cracking, or warping.
Understanding how to apply deck stain correctly during these intervals ensures your wood remains protected against harsh environmental elements. Factors such as local climate, foot traffic, and the quality of the previous application will ultimately determine the exact timeline for your specific outdoor space.
Table of Contents
Introduction
How to Stain a Deck for Professional Results
What is the Best Deck Stain to Save Time and Money?
How to Prep a Deck for Staining for Long-Term Health
How to Apply Deck Stain in the Right Conditions
What is the Best Weather to Apply Stains to a Deck?
Professional Deck Installation and Related Services
Conclusion
Frequently Asked Questions
How to Stain a Deck for Professional Results
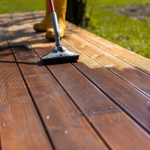
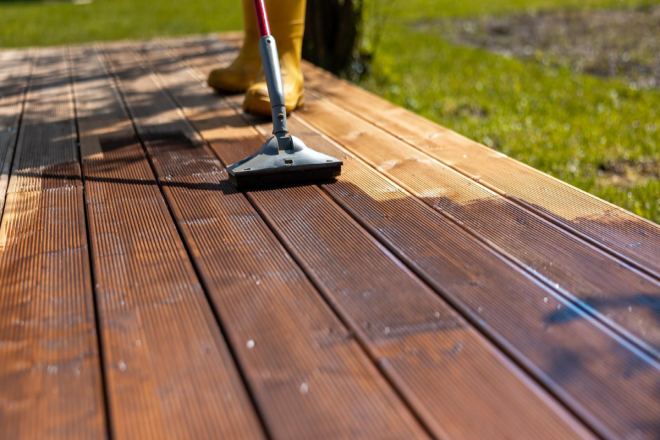
The longevity of your UV protection starts with a proper application technique. When learning how to stain a deck, the goal is to achieve deep penetration into the wood pores rather than just a surface coating. You should apply the stain in thin, even coats to avoid pooling. If the stain sits on top of the wood without soaking in, it will likely peel within a year, leaving your deck vulnerable to the sun. Consistency is key during the application; working one board at a time from end to end prevents lap marks.
For homeowners looking for high quality results, using a brush to back-brush the stain into the grain after spraying or rolling is a proven method to ensure every fiber is coated. This extra effort during the initial phase significantly extends the time between maintenance cycles. Beyond the technique, the quantity of stain used matters. Over-application can lead to a sticky surface that attracts dirt, while under-application leaves the wood thirsty and exposed. By mastering how to stain a deck, you are essentially creating a sacrificial layer that bears the brunt of the weather so your structural lumber does not have to.
How to Choose the Right Deck Contractor for Your Home
What is the Best Deck Stain to Save Time and Money?
Choosing the right product is essential for protecting your investment. When customers ask what is the best deck stain, the answer depends on how much of the natural wood grain they wish to see and the level of maintenance they are willing to perform. High-quality oil-based stains are often preferred for their ability to penetrate deep into the wood, providing internal UV protection. However, modern water-based acrylic stains have improved significantly and often offer superior color retention in high-sun areas.
According to research from Consumer Reports, premium stains with higher pigment concentrations can last up to twice as long as budget-friendly alternatives under intense sun exposure. While cheaper stains save money upfront, they often require reapplication every year, costing you more in labor and material over time. When determining what is the best deck stain, consider the opacity:
Transparent: Best for new, high-end wood; requires yearly checkups.
Semi-Transparent: The perfect balance for most homeowners, offering good grain visibility and solid 2 to 3 year protection.
Solid Color: Best for older decks; lasts 4 to 5 years but hides the wood grain.
How to Prep a Deck for Staining for Long-Term Health
Preparation is the most critical step in the entire process. If you are wondering how to prep a deck for staining, you must start by removing any dirt, mold, or old, failing finish. A specialized deck cleaner should be used to open the wood pores. If the wood is grayed from sun damage, a wood brightener can help restore the pH balance and improve the stain’s ability to bond with the fibers. Without this step, the new stain will simply sit on top of the dead wood cells and peel away shortly after application.
Sanding is often necessary if the wood feels fuzzy or if there are stubborn patches of old stain. You must ensure the wood is completely dry before applying the new coat. Using a moisture meter can be helpful; the wood moisture content should be below 15 percent to ensure the stain adheres correctly and provides the intended UV barrier. The American Wood Council emphasizes that moisture management is essential for wood longevity. Knowing how to prep a deck for staining is 70 percent of the job; the actual staining is simply the finishing touch that seals in your hard work.
How to Apply Deck Stain in the Right Conditions
Timing your project with the forecast is vital for a successful finish. When researching how to apply deck stain, you will find that environmental factors play a massive role in the final outcome. You should avoid applying stain in direct, hot sunlight, as the heat can cause the stain to dry too quickly before it can penetrate the wood. This results in a film that will eventually flake off. Ideally, you should wait for a string of dry days with temperatures between 50 and 90 degrees Fahrenheit.
If the wood is too hot, the solvents in the stain evaporate prematurely, leaving the pigment stranded on the surface. Conversely, if it is too cold, the stain will struggle to cure, remaining tacky for days and attracting debris. Always check the manufacturer’s specific recommendations for drying times. When you understand how to apply deck stain, you learn to respect the weather as much as the wood itself.
What is the Best Weather to Apply Stains to a Deck?
The perfect window is a dry, overcast day. Many professionals believe what is the best weather to apply stains to a deck? is when the sky is cloudy but there is no rain in the forecast for at least 48 hours. This allows the stain to dry slowly and naturally, ensuring the resins bond deeply with the wood. Humidity should also be moderate; high humidity can extend drying times significantly, potentially trapping moisture under the finish which leads to premature failure.
Factors That Shorten Your Protection Timeline:
Direct Sun Exposure: South-facing decks with no shade require more frequent care.
Horizontal Surfaces: Deck flooring wears faster than vertical railings or posts.
Heavy Foot Traffic: Friction from shoes physically wears down the protective layer.
Standing Water: Poor drainage can cause the stain to lift from the wood surface.
Professional Deck Installation and Related Services
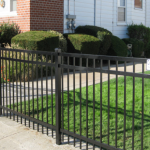
While staining is a DIY-friendly task, the foundation of a long-lasting outdoor space is professional Deck Installation. A deck built with high-quality, pressure-treated lumber will respond better to staining treatments over time. At Cuttin Edge Fence, we specialize in high-quality Deck Installation designed for durability. Beyond decks, we also offer professional fencing solutions, including wood, vinyl, and ornamental iron fences that require similar UV protection strategies to maintain their beauty.
Proper structural design allows for better water runoff, which directly impacts how long your stain will last. Choosing professional Deck Installation ensures variables like ventilation and wood seasoning are managed from day one, giving your UV protection the best chance to succeed. If you are also considering adding privacy to your yard, our team can assist with high-quality fence installations that complement your newly stained deck.
Conclusion
To ensure your deck remains a beautiful and safe part of your home, reapply a quality stain every two to five years depending on the finish type. Proper preparation, choosing the right product for UV resistance, and waiting for the correct weather conditions are all essential steps. By maintaining this schedule, you protect your structural investment and save money on long-term repairs.